As you move your video productions up to a higher production quality you’ll find that one of the easiest and biggest improvements you can make is to the audio. Today, allow me to discuss how to sync an outside-of-the-camera audio source with your footage using a video editor. I’ll be demonstrating how to do this in Camtasia 9, but you can really use any non-linear video editor to do this.
Why is it better to get additional audio beyond your camera?
You bought a camera that has a microphone on it, right? Your cellphone has a great camera and a microphone too. Why not just use the audio that is onboard?
Here are a few reasons to record separate audio:
Distance from your subject:
- Your camera, depending on the kind of lens you’re using, may be quite far away from your subject. If you’re recording with anything other than a cellphone, you’ll have a lot of control when it comes to that distance, but you may find more success by backing away from your subject. You can learn more about that here.
Poor audio sensitivity and focusing:
- Most microphones that are built into our cameras have their own type of input leveling software built in. They may sense that the audio from your subject is pretty quiet, so they’ll increase their sensitivity to try and compensate. They can’t increase only the sound your subject is making but rather all of the sound in the room. That refrigerator in the next room will sound like it’s in the room with you, and the air conditioner will sound like a tornado.
Poor microphone location:
- Lots of onboard microphones are not placed in super great areas. On our Canon 5D the microphone is just to the side of the lens and will pick up every touch of the camera, every adjustment. The microphone on a BlackMagic Pocket Cinema camera is in a similar place, but is buried behind some of the hardware and doesn’t pick up much at all. Even your cell phone microphone is more than likely located on the edge of the device so it’s not even facing your subject.
I won’t get into the types of microphones there are or how to pick the best one for your production, but I will tell you that there are several options and that all of them are much better than just using your onboard mic.
Let’s move on. So you’ve recorded your video—in my case an interview—with both your camera and your external microphone. You’ve offloaded the footage and audio onto your computer and now you’re loading it up in the editor. Here’s where we’ll open Camtasia. (I'm using Camtasia 9, but these actions will work for all versions of Camtasia.)
How to Sync Up Audio and Video
Step 1: Import your files
I’ve imported both my audio and my video into my editor. I’ll drag the audio onto the bottom track and the video to the track above it. In some editors you won’t have a choice. For example, in Adobe Premiere all of your video tracks go above and all of your audio tracks go below.

You’ll notice that my video file and my audio file are different lengths. This is because I hit record on my microphone before I hit record on my camera, and reversed that order when hitting stop. It’s OK that they don’t line up right away, it will take some adjusting.
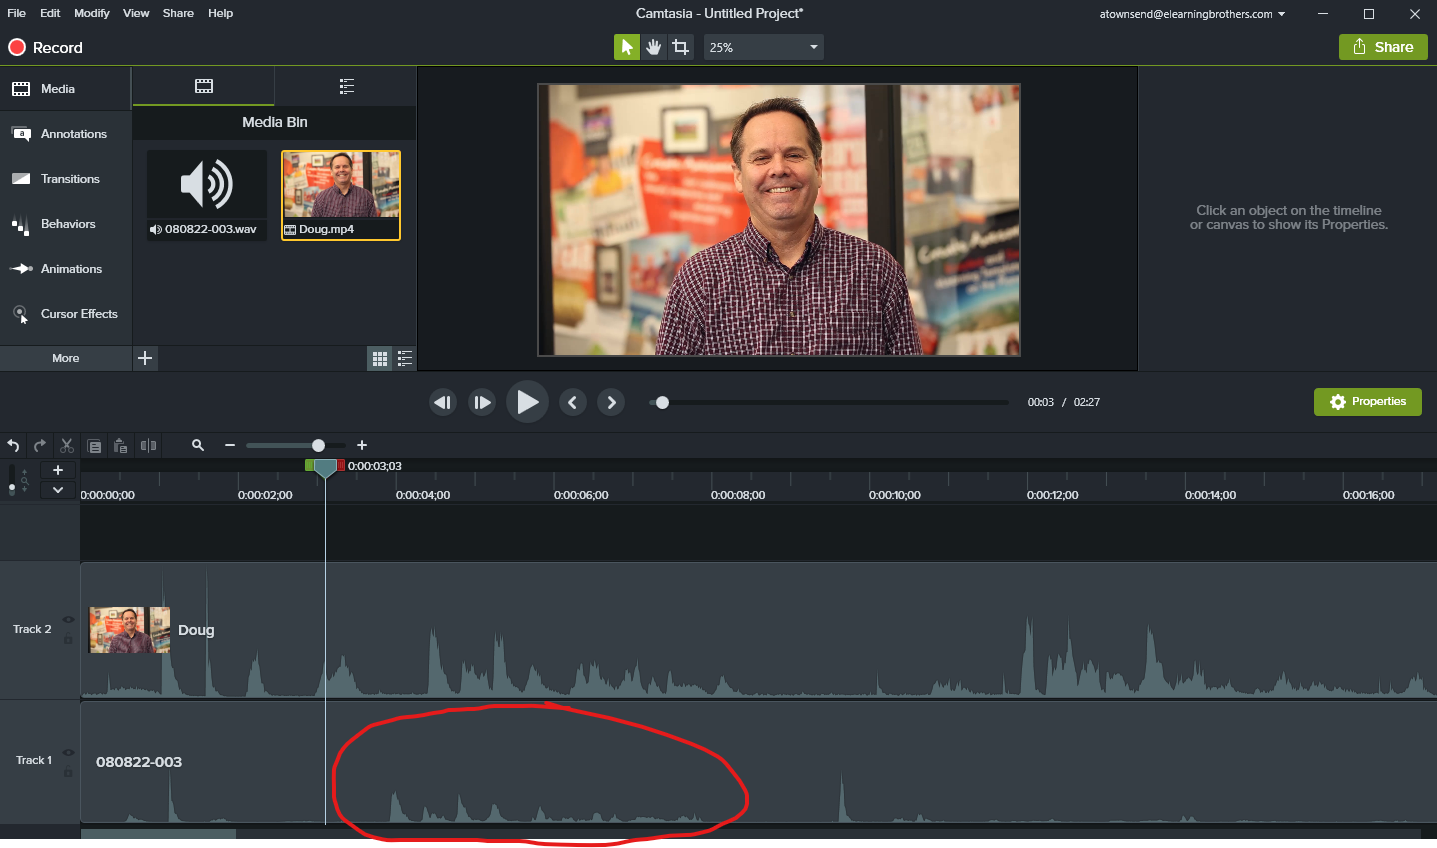
Step 2: Find a waveform to sync in your video file
I’ll zoom into the beginning of the timeline to try and focus on one specific phrase said by my subject. Just the first phrase he says will do. In this case I hear “Hi! My name is Doug Lange.”

Step 3: Find the matching waveform in your audio file
In the track below there is little to no sound. This means I’ll need to scrub to a different point on that track to try and find “Hi! My name is Doug Lange.” By cutting out the silence at the beginning of that audio track it is much easier to find the piece I need.
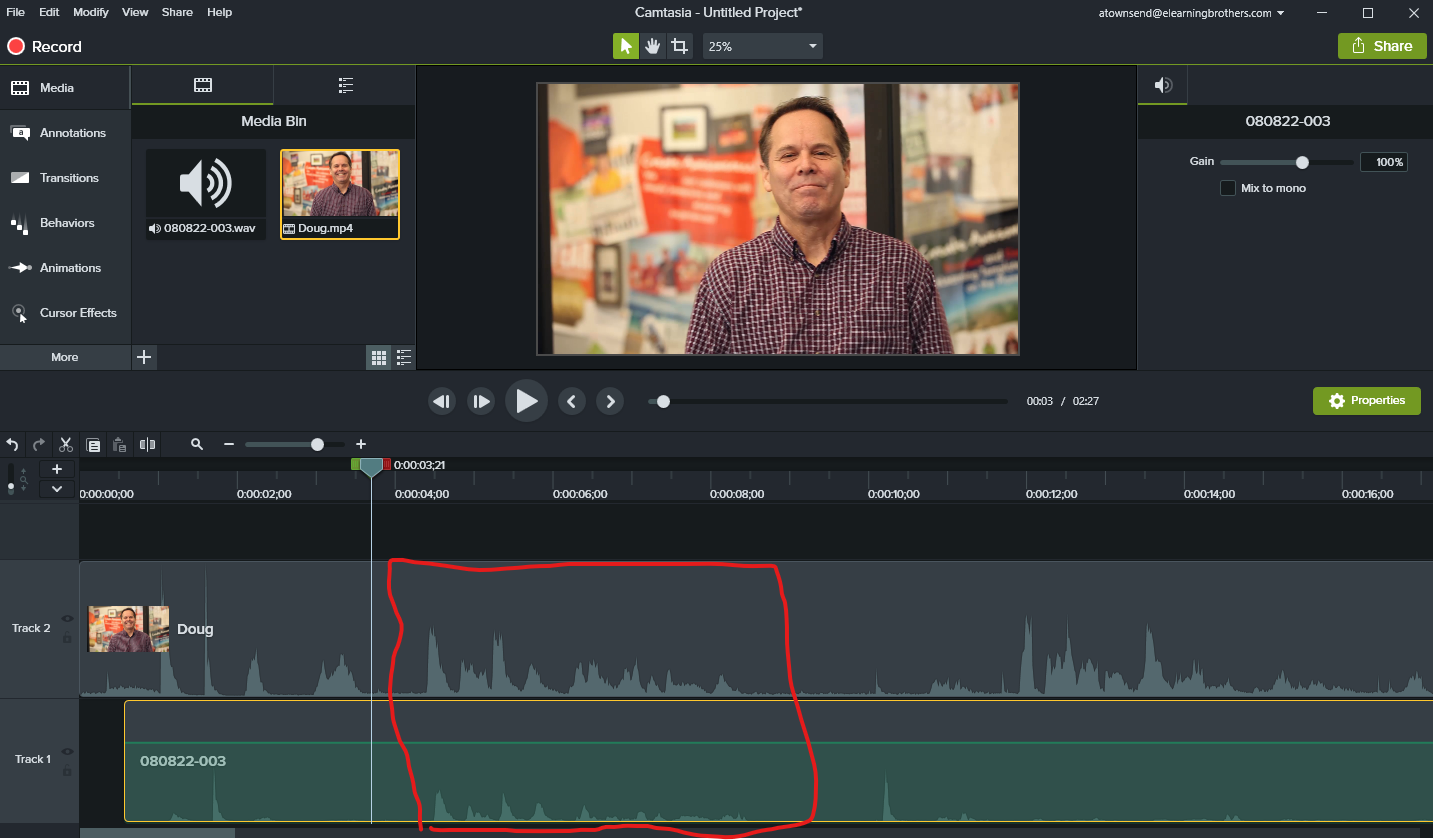
Step 4: Line up both waveforms
The waveforms somewhat match as well with peaks and valleys in the same basic lineup. Now I just have to move it around a little until it lines up, and when I push play there isn’t an echo. *Super hint: Hold the control key when fine-tuning your tracks so that they only move frame by frame and don’t lock with any other tracks.*
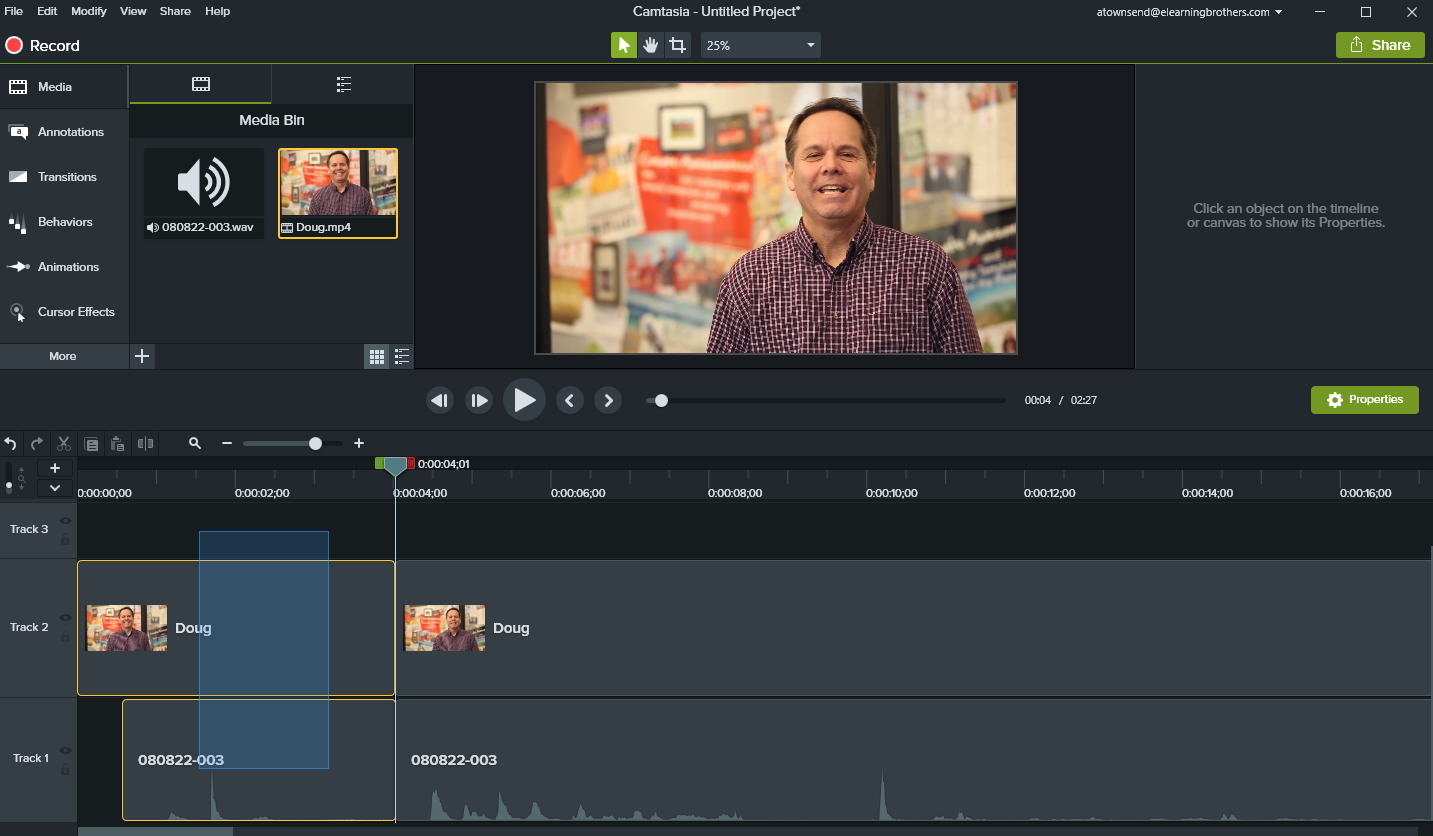
Step 5: Delete the video’s waveform
Now that they are lined up and there is no echo, I’ll right-click on the video track and select “Separate Audio and Video.” The new audio track that is created above the video can now be deleted.
Step 6: Delete the beginning bits of both files
To be safe I also like to snip and delete the video/audio before it starts so that I have a clear connection for the two.
And just like that you’ve created a higher quality audio recording that is synced up with your video. You can use a clap, or a slate, to make that syncing a little easier.
If you’d like more information on audio editing you may find some gems in the following blogs:
- Two Ways to Edit Your Background Audio that You Didn’t Know About
- 4 Priorities For Your Voice Over Recording
- Spy on Our Video Expert While He Edits in Camtasia 18
eLearning Brothers also offers Camtasia templates to add style to your eLearning videos. Explore our collection of themes, intros, transitions, and more.
Here’s the finished product of what was demonstrated here:
Sign up for our newsletter to get news and tutorials like this delivered straight to your inbox.