
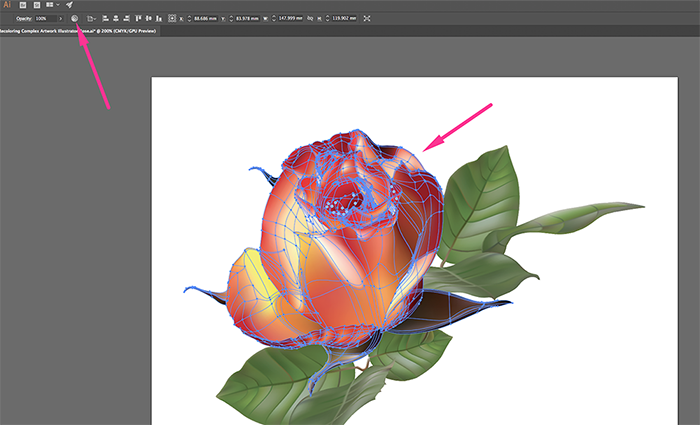
Say you find an awesomely-realistic vector file from a stock site (like the rose illustration below), but it’s not the color you’re looking for and you’d like to recolor it. Depending on how the file was created, this can be an extremely daunting task, especially if the illustration uses 30 or 40+ colors and/or has a gradient mesh to blend colors. Ugh!

I’m going to show you how to use the Recolor Artwork tool in Adobe Illustrator to efficiently recolor your vector art so you don’t spend hours and hours messing with your file just to be frustrated when it doesn’t turn out how you want it.
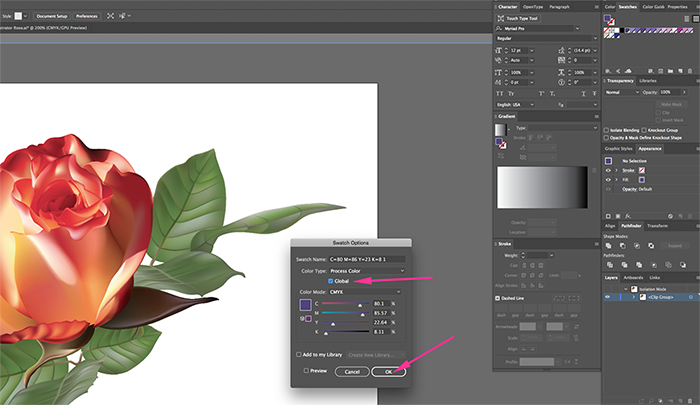
- First, you need to set the colors you’d like to use for the final piece as global colors. This can be done by double-clicking the color swatch used (found in the swatches panel). When the Swatch Options dialog box pops up, check the “Global” checkbox and then click “Ok.” The swatch will now have a white triangle in the corner indicating it’s a global color. This is important because it allows you to change the swatch to a different color and any art "assigned" to that swatch then gets automatically updated to the new swatch.
- The great thing about “Recolor Artwork” is that it works on whatever you have selected. So, select the section(s) of the vector artwork you’d like to change. In this example, I’m just going to select the rose and not the leaves.
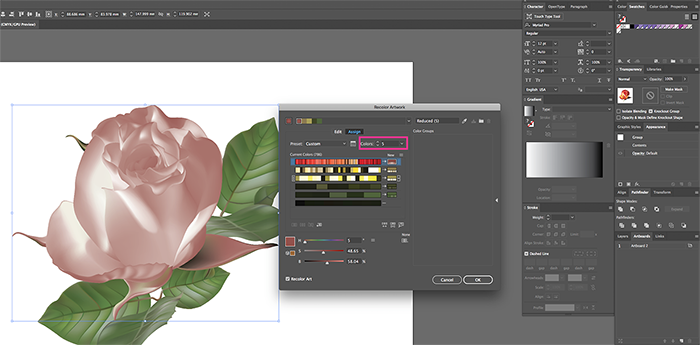
 And then click on the color wheel button in the top menu bar (it will appear after a shape or group of shapes has been selected.)
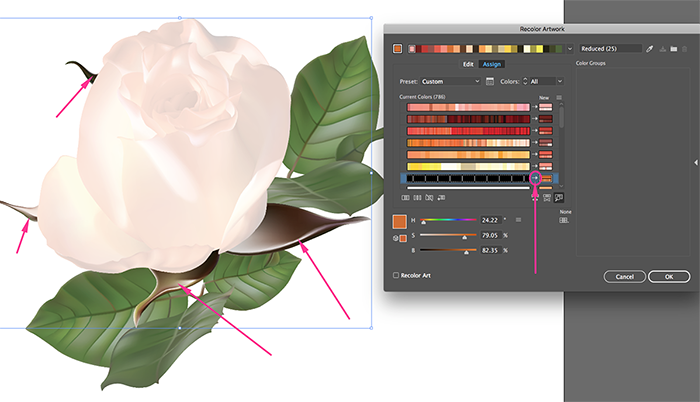
 - Once in the Recolor Artwork dialog box it’s going to provide you with a ton of info. It will tell you how many colors are being used, it individually lists the colors currently in the selection, lists their hue, saturation, and brightness values, etc.

- It’s a lot to take in. So we’re going to narrow our focus a little.
- We are going to be focusing on the list of current colors. These rectangles on the left are the colors that are currently in the doc; the little arrows just to the right of them are indicating what they are going to be changed to and the smaller rectangles to the right of the arrows are what the new color is going to be. The default in Illustrator is to have them re-mapped to the same color as a starting point. So, we need to double click on the smaller rectangle of color to the right of the arrow to open up the Color Picker dialog box. From here you can change the color just like you normally would.
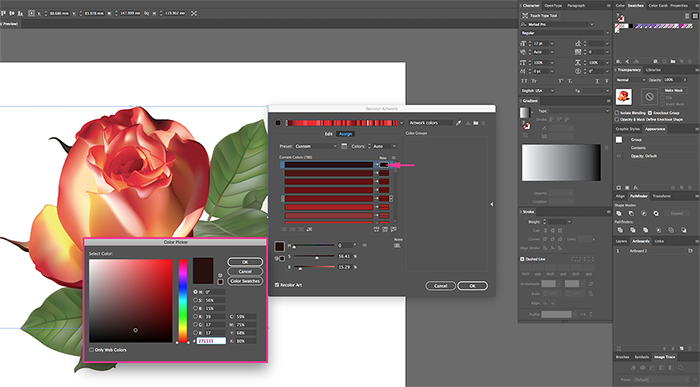
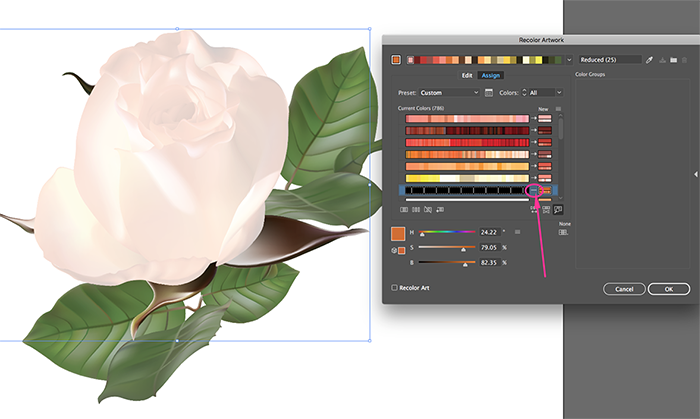
Of course, it would be madness to go through and change every color in the selection this way—786 is a lot of colors!!! - So, we need to look at this a little differently and focus on the range of colors—kind of like we would if we were working in Photoshop. In order to do this, we need to decrease the number of colors we are working with. We can do that here by changing the Colors setting from “Auto” to something a little more manageable, let’s say five.
Illustrator will automatically start to group like colors together for you. Make sure you have the “Recolor Art” button checked (down in the bottom left-hand corner) and you can start to see the effects it’s having to the rose on the left.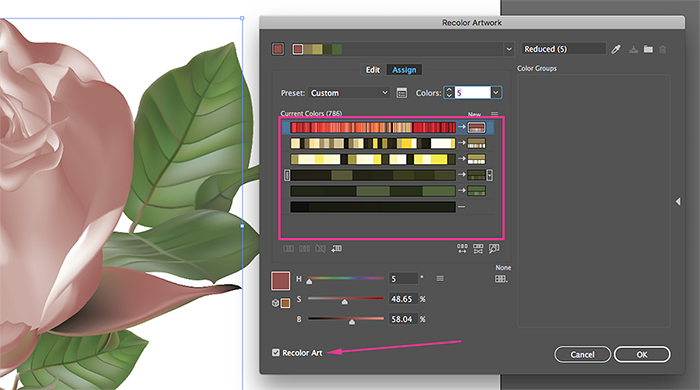
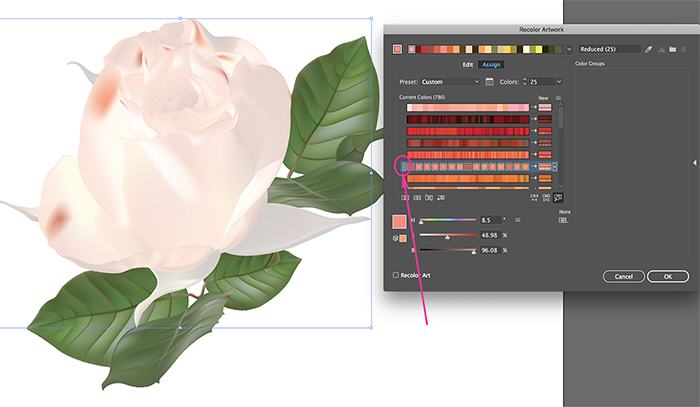
NOTE: If either black (#000000) or white (#FFFFFF) is being used in the artwork, Illustrator will automatically treat it as a separate/special color and won’t combine it with any other colors. - Now going from more than 700 colors down to five was too big of a jump because now I have very little control over the color groupings. So let’s bump the number back up a little. I’m going to try 25 instead.
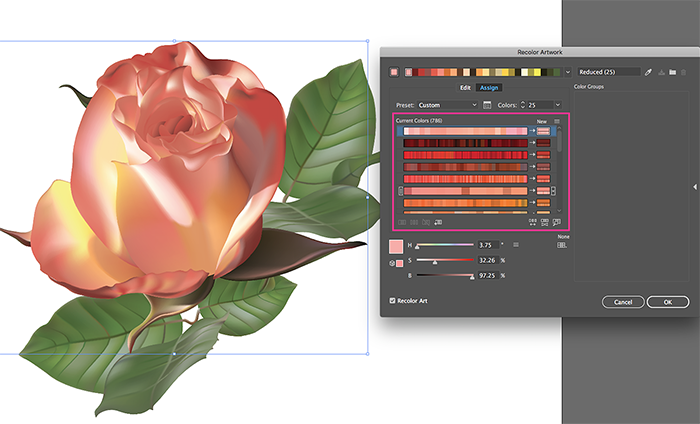 This gives us far more control. Now from here, we can start dragging and dropping these color bars on top of each other to combine them manually. To better help identify where each of these color groups are located on the art, click the little magnifying glass.
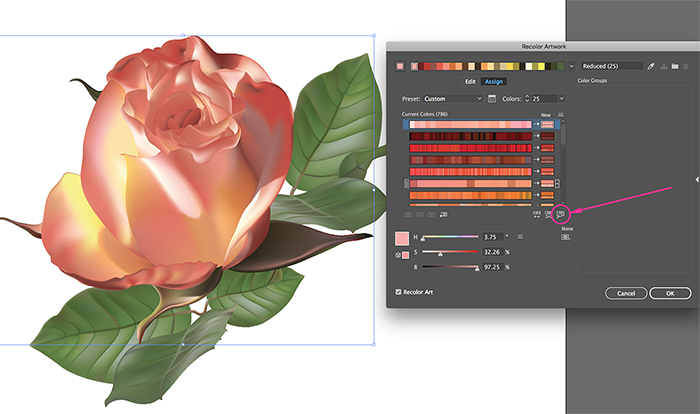
It’s going to gray-out the artwork and highlight each of the color groups as you click on them in the dialog box. Make sure to click off to the left edge of the color bar so that it selects the entire bar and not just a single color within that bar.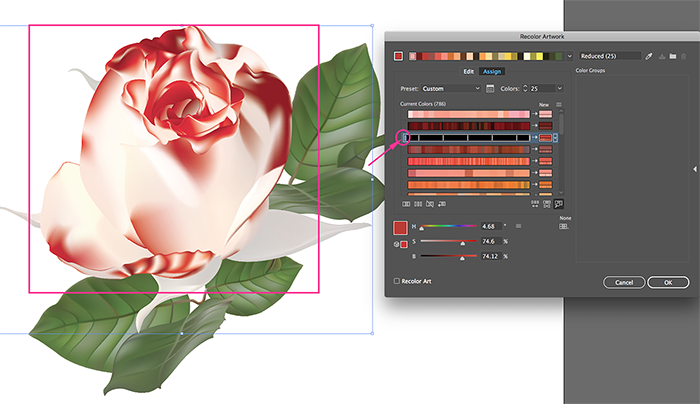
Here you can see I have selected a bar of colors and they are showing through on the grayed-out portion of the art. Once we’ve identified where the colors are located we can start combining them manually to reduce the number of colors we’re changing in the end.
IMPORTANT NOTE: You can’t really undo anything while in this dialog box. Command/Control + Z won’t work while in this tool. So plan carefully before you start combining color groups or you may have to start over.
- To combine color groups we need to hover over the left edge of a color group. A little button will appear with the instructions “Drag to move all colors in a row.” Click that button/handle and drag that group on top of the color group you want to combine it with.
Here I have dragged this color group and combined it with the color group at the top.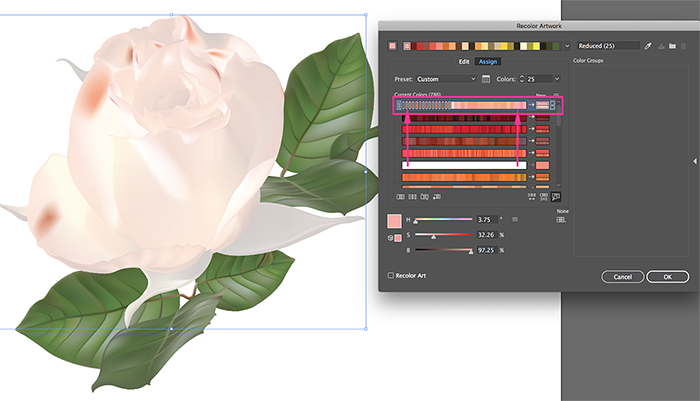 Continue to group the colors until you are satisfied with color groups you have. I have combined mine down into 6 groups and moved them all up in this little window so that I can see them all at the same time.
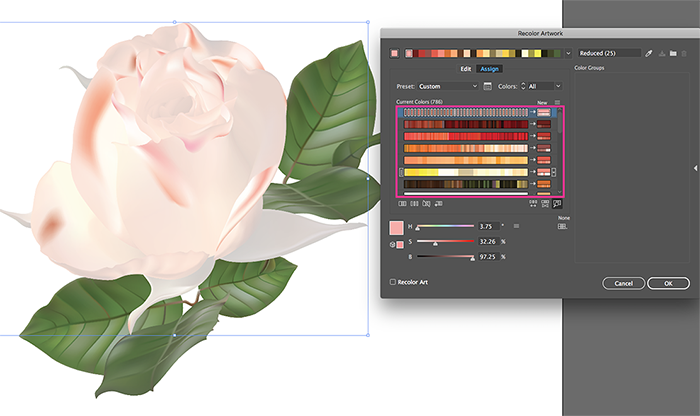
- Ok, now we can actually focus on changing the colors! Wahoo!
I’ve decided I don’t actually want to change the color of the sepals on this rose; so I’m going to tell Illustrator I don’t want to change it by clicking on this arrow between the sepals color group and the new color bar. In doing so it changes it to a line.
 Now double click on one of the new color bars you’d like to change the color of. In the Color Picker dialog box, click on the color swatches button and choose one of your global swatches, then click ok.
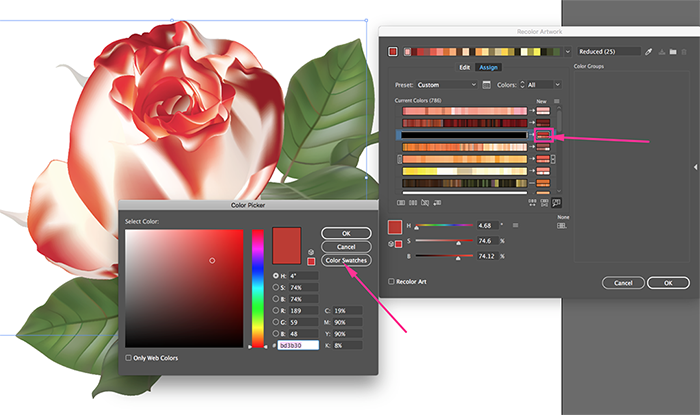
Make sure the Recolor Art button is still checked (down in the bottom left-hand corner) so you can see the effects it’s having on the artwork.
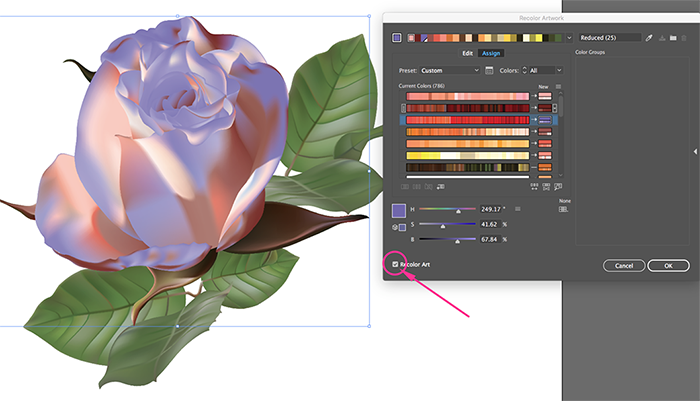
Once you have all your colors changed, click ok on the Recolor Artwork dialog box.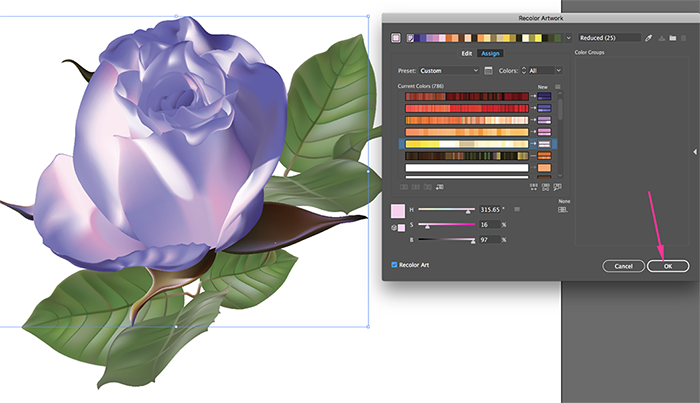
- Last but not least, the importance of using Global colors.
If you decide it’s not quite the color you were going for; instead of having to go through the whole recoloring process again you can just double-click on the global swatch in your Swatches panel and modify the color from the Swatch Options dialog box (and make sure to check the preview button so you can see the color change in real time).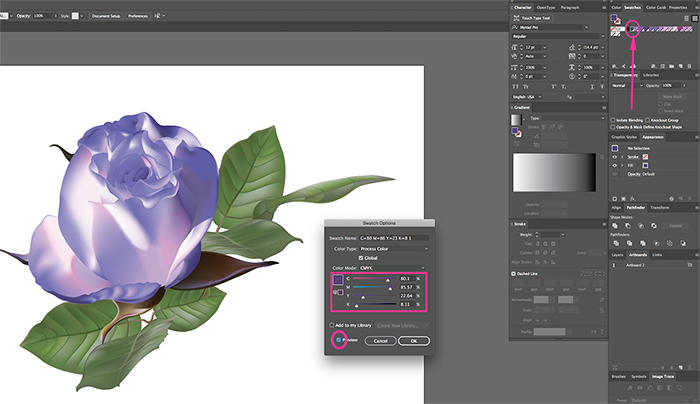
And that’s it! Be sure to let us know in the comments if you try this out.
Check out our other graphic design resources, tips, and tricks on the blog. Then sign up for a free Template Library account to practice your new skills!


