
Course starters have been a part of the ELB Learning template library for a few years now. A course starter takes popular layouts and interactions and skins them in a particular theme of graphic elements.
Course Starters, as the name suggests, give you everything you need to get up and running with your course development. And since all the elements are customizable you can reskin them easily to meet your company needs.
Until recently these time-saving beauties have only been available for traditional eLearning authoring tools such as Lectora, Storyline, and Captivate. Well, now we’ve taken what we’ve done with those templates and have now created Course Starters for CenarioVR, making authoring VR content even easier.
How can you effectively use these new CenarioVR Course Starters in your workflow?
Well, that’s exactly what I’m here to talk about today. I’ll be giving you an overview of what’s included in the file as well as tips on how to customize and use them in your own development process.
For our example today we’ll be walking through our Wireframe Course Starter as it will be the base for any additional Course Starters to be released, such as our nature-themed Explorer Course Starter or our Abstract Course Starter.
How to Add a Course Starter to Your My Scenarios
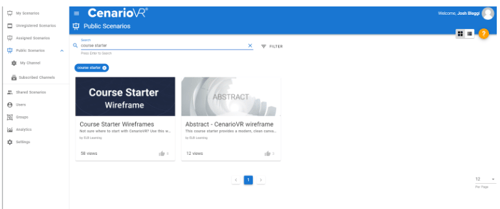
The first thing you're probably wondering is “Where do I find these Course Starters you speak of?” Any course starters currently available can be found in the Public Scenarios of CenarioVR. Just search for Course Starter and any available should show in the search results.
When you hover over the thumbnails for the scenario you’ll see a three dot menu appear in the top right of the thumbnail. Select this and you’ll see an option to download the source file.

Now select your My Scenarios. Hover over Create Scenario and you’ll see a new option appear below it to Import Scenario.
Select this option and then find and select the Course Starter you just downloaded to import.
After a few seconds, the scenario will load in the authoring interface.
What Is Included in The Course Starter?
Each course starter will have some slight differences from each other in terms of what’s included. Some of the scenes included will simply be presentational in nature, such as a Welcome layout or a compare four layout. Other scenes will include more interactive options such as:
- Click To Reveal
- Drag and Drop
- Carousel
- Flip to Reveal
There will also typically be a Quiz included. These layouts and interactions will give you plenty to play with when creating your scenarios.
We won't break down the mechanics of each of these scenes within this blog, but I do plan to break some of these down in future blog posts, so be on the lookout for those.
How Should I Use Course Starters In My Scenario Creation?
There are a couple of approaches you can take when using the course starters.
First, you could just replace the included 360 images and use then just edit the objects in the scene to include your content. You can also simply change out any of the hotspots or images included in the same fashion to make them fit with the rest of your scenario.
To do so, simply open the properties for the object you’d like to change and upload or select a new asset from the Media Library to change the asset.
Second, you can convert the objects in the course starters into Clips and save them for use across multiple scenarios. Clips allow you to create a library of reusable elements that can then be used as often as you would like.
To create a Clip:
- Select the objects you want to be included in the Clip
- This can be the entire scene or just certain objects from the scene
- Right click and select Create Clip
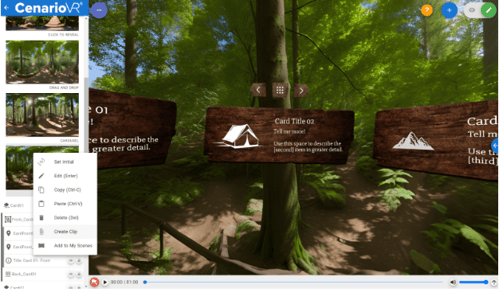
- The Clip will now be available in the Clips section of the Resources tab
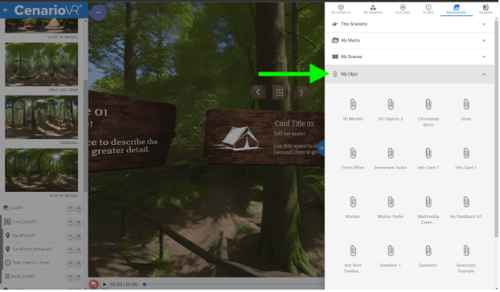
Now you can reuse these elements any time you want no matter the scenario. You may also want to consider making edits to the course starter before saving them to your Clips. Note that Clips are only available to you and not shared across the other authors in your organization. However, you can export a clip and then import it into another Author account so someone else can have access to it.
I hope this gives you some idea of how Course Starters and Clips can help improve your workflow. Starting from a template and templatizing elements can be very powerful and useful in streamlining your workflow.
If you're looking for another way to get up and running even faster check out the AI Wizard to generate your 360 scenes. You can learn more about that here.
Be on the lookout for more time-saving tips for CenarioVR in future blogs.


