
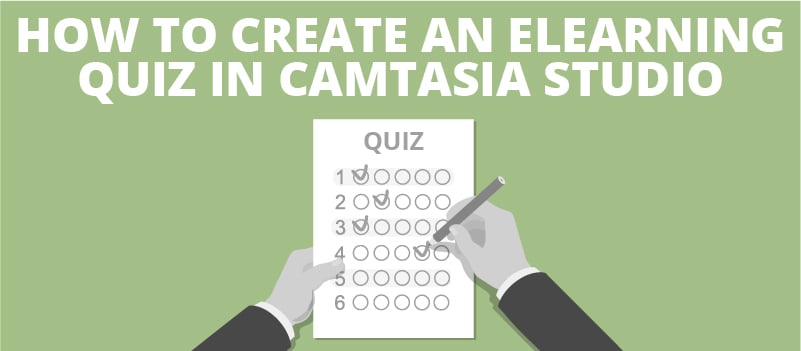
We’re sure you’ve seen plenty of great videos produced with Camtasia Studio. These are the videos that train us how to use software: how to edit a picture, or create a video, or navigate a website. But this is the tip of the proverbial iceberg when it comes to the powerhouse that is Camtasia. In this blog, we’ll be unfolding one of the interaction aspects of Camtasia and discussing how it can streamline your training program.
A key element of learning is checking understanding. Quizzing is a feature easily utilized for in-line testing in Camtasia. These results can be set up to be a simple understanding check for the user or to be a testing method, sending the results to an email address in a spreadsheet or use SCORM for your LMS. By the end of this article, you’ll be ready to start quizzing your viewers with the built-in quizzing feature.
Scrub to where you want your quiz to be. This can be done by clicking on your timeline scrub bar where you want a quiz and pressing “q”. This will open up the “Quiz View” bar on your time line. If you wish to hide that bar, you can select the gear to the left of the timeline, and select “Hide Quiz View”.
 Click to enlarge.
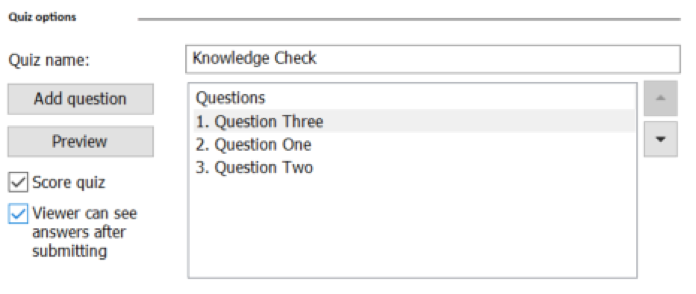
In the “Quizzing” menu, you can name your quiz as well as add your questions and subsequent answers. The default number of questions is one, but if you want to add multiple questions to a quiz, select “Add question”. There are also options to have your quiz scored (meaning there are right and wrong answers to your questions) and to allow the viewer to see their answers after the quiz is scored.
 Click to enlarge.
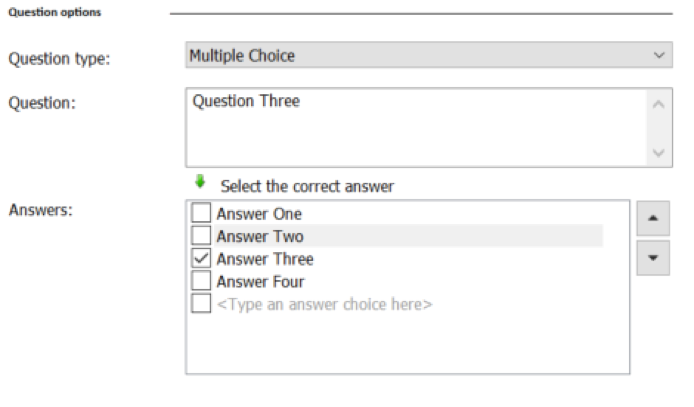
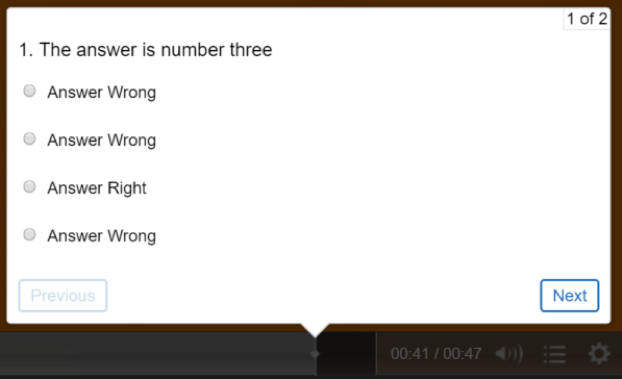
There are options for each question directly below the naming and question list. Select the question you want to customize and then begin your customization. This includes selecting the type of question (Multiple Choice, Fill in the Blank, Short Answer, and True/False), asking the question, and listing the answer options. Don’t forget to mark which answer is correct!
 Click to enlarge.
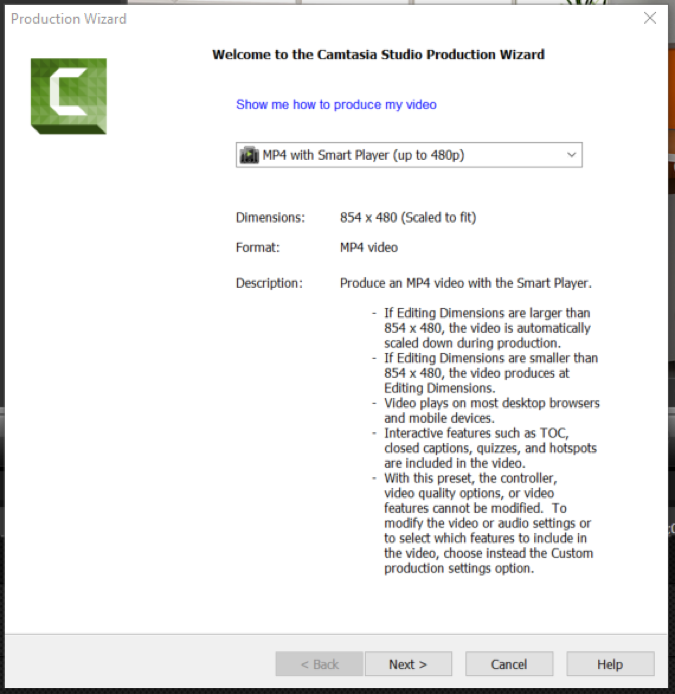
When you are finished with your project, you’ll need to remember to select one of the “Produce and share” options that features the interactive abilities you’ll need for your quiz. This includes sharing directly to Screencast.com or exporting to MP4 with Smart Player. Smart Player is the media player created by TechSmith that allows interactive videos to be played on any device. For now, we’ll export to MP4.
 Click to enlarge.
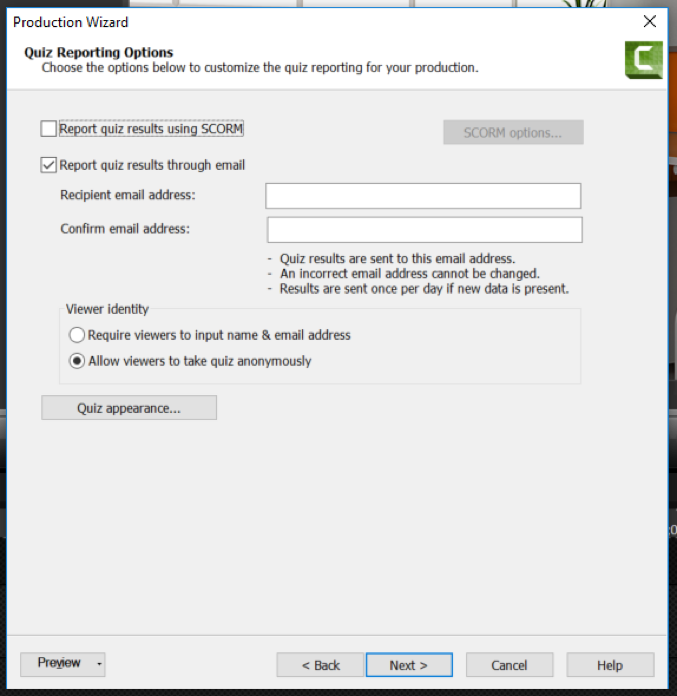
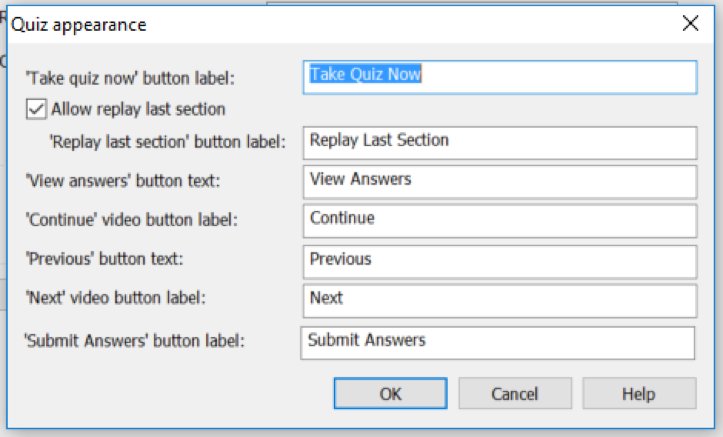
After selecting your export choice, you’ll be asked how you want the results of the quiz to be reported. You can select to report results using SCORM for your LMS, or to have emails sent to you. There are also options to allow users to submit their quizzes anonymously or with a name and email address. An option to adjust Quiz appearance can be found on this page, as well. These options will adjust the text shown on the user buttons when taking the quiz.
 Click to enlarge.
 Click to enlarge.
After clicking Next, you’ll be asked where to save your production if you selected to export to an MP4. You can also select to play your video after production and test your quiz.
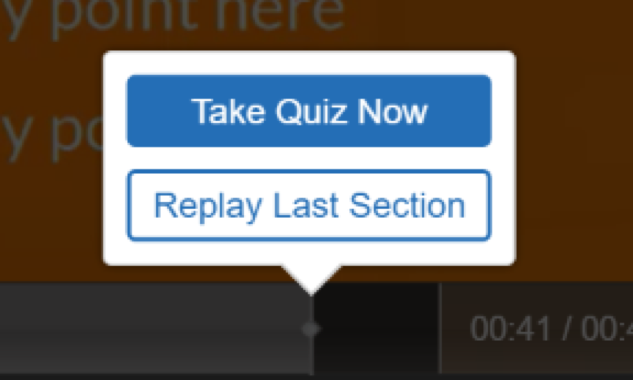
When a quiz point comes up in the video, the Quiz option will pop up from the bottom of the player.
 Click to enlarge.
 Click to enlarge.
Now you are ready to get quizzing! Adding simple quizzes to your courses is one way to make your eLearning training stick in the user’s mind, and stand out as top-notch. By receiving the answers to the quizzes via email, you can show, teach, and test all in the same production. Interaction will encourage a higher retention of information in your users, and a greater quality to your course.


